Keeping your car clean is essential for maintaining its appearance and protecting its paint job. While professional car washes are convenient, they can be costly over time. A DIY car wash allows you to save money and customize the cleaning process to your liking. In this guide, we will walk you through everything you need to know to wash your car at home like a pro.
Benefits of a DIY Car Wash
Washing your car at home comes with several advantages, including:
- Cost Savings: A DIY car wash is significantly cheaper than regular visits to a commercial car wash.
- Personalized Care: You can focus on areas that need extra attention and use products that suit your car’s needs.
- Eco-Friendly Option: By using biodegradable soaps and limiting water waste, you can make your car wash more environmentally friendly.
- Protection for Your Paint: Automatic car washes can sometimes cause micro-scratches. Hand washing reduces this risk.
Essential Supplies for a DIY Car Wash
Before you start, gather the following materials:
- Two buckets (one for soapy water, one for rinsing)
- A hose with a spray nozzle
- Car wash soap (avoid dish soap as it can strip protective wax)
- Microfiber wash mitts
- Soft-bristle brushes for wheels and tires
- A drying towel or chamois
- Car wax or sealant (optional but recommended)

Step-by-Step Guide to Washing Your Car
Follow these steps to achieve a spotless car wash at home:
1. Choose the Right Location
Pick a shaded area to prevent soap from drying too quickly, which can cause streaks. Avoid washing on hot asphalt or gravel to prevent dirt from splashing back onto the car.
2. Pre-Rinse Your Car
Use a hose to rinse off loose dirt and debris. This helps reduce the chances of scratching the paint when you start scrubbing.
3. Wash Using the Two-Bucket Method
Fill one bucket with soapy water and the other with clean water. Dip your wash mitt into the soapy water, clean a section of the car, then rinse the mitt in the clean water before dipping it back into the soap bucket. This method helps prevent dirt from being reintroduced to your car’s surface.
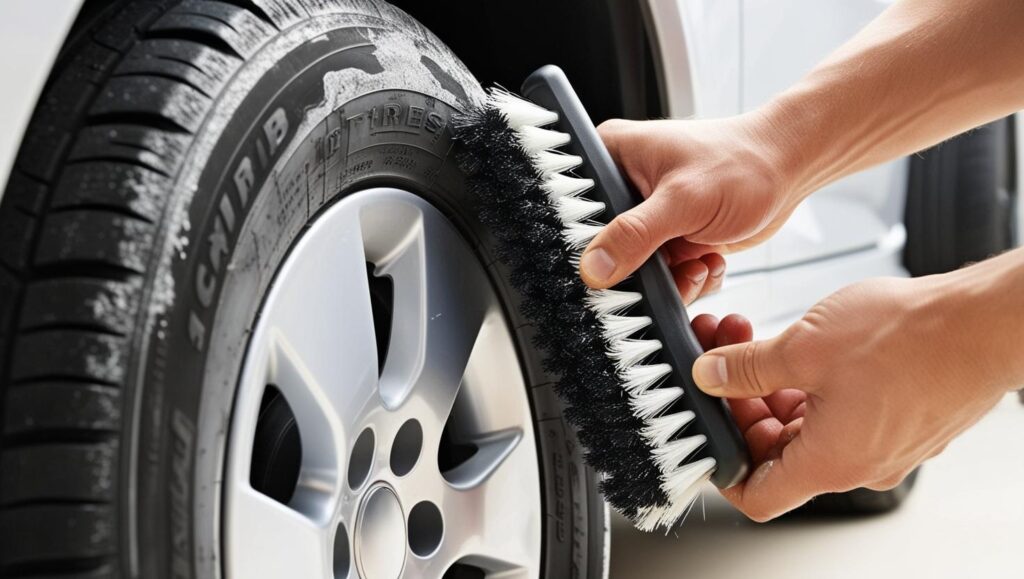
4. Clean the Wheels and Tires Separately
Since wheels tend to accumulate the most dirt, use a separate brush and soapy water to scrub them. Rinse thoroughly to remove brake dust and grime.
5. Rinse and Dry
After washing all sections, give the car a final rinse from top to bottom. Use a microfiber towel or chamois to dry the car completely, preventing water spots.
6. Apply Wax or Sealant (Optional)
For added protection and shine, apply a layer of car wax or sealant. This step helps repel dirt and water, keeping your car cleaner for longer.
Pro Tips for a Streak-Free Finish
- Wash your car from top to bottom to prevent dirt from spreading.
- Use a grit guard in your bucket to trap debris and prevent scratches.
- Dry the car immediately after rinsing to avoid water spots.
- Clean windows with a glass-specific cleaner for a streak-free shine.

Common Mistakes to Avoid
- Using Dish Soap: It strips protective wax and damages the paint.
- Skipping the Two-Bucket Method: This can lead to scratching your car with dirt particles.
- Washing in Direct Sunlight: Causes soap and water to dry too fast, leading to streaks.
- Using a Regular Towel to Dry: Opt for microfiber towels to prevent scratches.
Final Thoughts
A DIY car wash is an excellent way to maintain your vehicle’s appearance while saving money. With the right tools and techniques, you can achieve a professional-quality clean at home. Whether you’re a car enthusiast or just want to keep your ride looking its best, following this guide will ensure a spotless and streak-free finish every time. Happy washing!